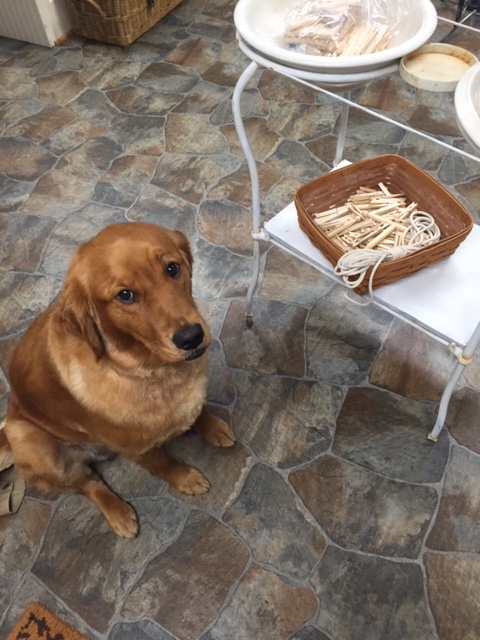

“If today is finally Cookie-Baking Day…why did you bring me into the laundry room??”


“So let me try to understand this…
you plan to use clothespins to bake cookies???”
“Call me a monkey, but I’m not holding out much hope these will taste very good.”
But they will, Helen! I promise!!!
This month I’ve chosen to bake the Clothespin Cookie!
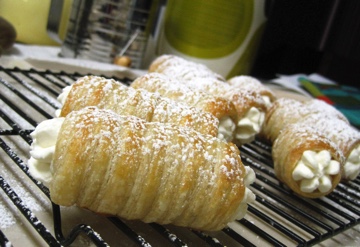
For those who don’t know – Clothespin Cookies are flaky pastry tubes covered in powdered sugar and filled with a creamy buttery icing. Another name for them is what ‘Pittsburghers’ call, the Lady Lock!
This is one of our son-in-law’s family favorites and since they will all be together this Fourth of July Holiday I’ve decided to bake these in honor of them (all!)


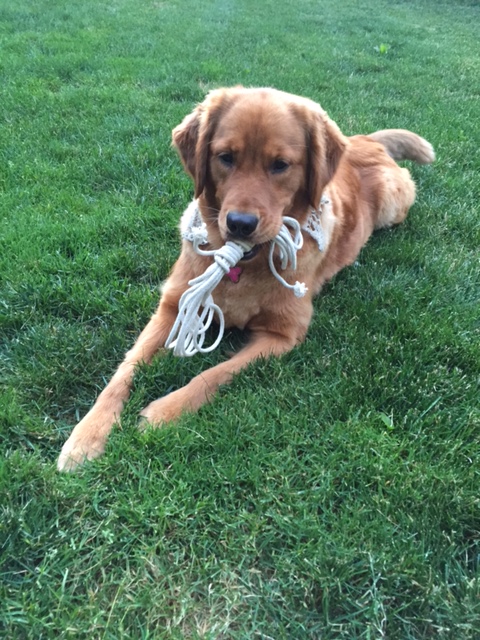
(My son-in-law partaking in his favorite 4th of July Activity!)
They are so fond of them that our son-in-law’s father, Greg, has been rumored to sneak a few from the freezer from time to time! The prime-suspect everytime his lovely wife, Sheila, discovers an empty ‘once-filled’ cookie container; the freezer is currently being measured for a lock, now that Greg has moved his office to the basement where the freezer resides. (giggles!)

And since Helen is so bewildered to be using clothespins in the actual baking process…I have decided the easiest way to do this is to walk through from beginning to end and share the recipes and procedures as we go!

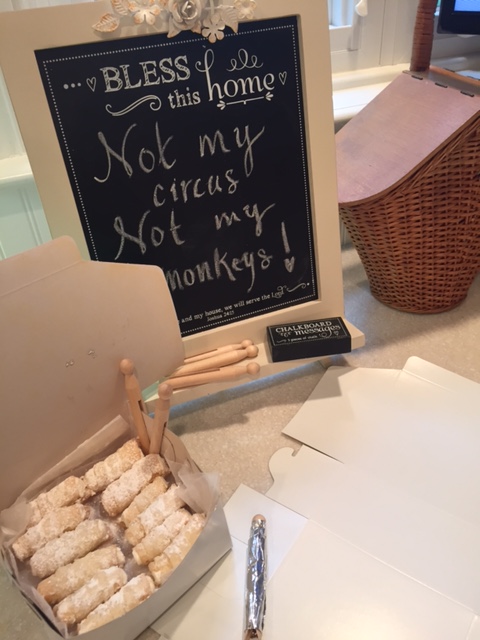
As far as tools you will want around 50 old school round clothespins; you do not want the kind that have the metal thingies in them to pinch, you want approximately 4″ long round peg-style ones. You will also need aluminum foil, a rolling pin, pizza cutter, non-stick spray & a cooling rack (ideally), a pastry bag to fill them is also quite handy (but a gallon baggie can be used in a pinch here, too) and a way to dust with powdered sugar – I use a small hand strainer.


Clothespin (Ladylock) Dough makes about 52
This recipe is made using the Pie Dough Method of mixing, meaning the fat is cut into the dry ingredients, the liquid ingredients are combined then the 2 are folded together using as little mixing as possible so as to develop as little gluten as possible – over developing gluten makes this style of pastry tough and dense, not light & flaky. Another factor to this is temperature! You want the fats to stay cold, so freeze the shortening a few hours before making the dough and cube both the shortening and the butter as soon as you are ready to start. This dough needs to rest & chill before rolling; you may go as long as overnight and as little as 2 hours with no noticeable differences in the end pastry.
3 1/2 cups Flour
8oz Butter, cold & cubed
10 Tbsp Shortening, cold & cubed
1/4 cup Sugar
pinch Salt
3/4 cup Cold Water
2 Egg Yolks
1 Tbsp Vanilla
Cut the cold, cubed fat(s) into the dry ingredients with a pastry cutter or forks until there are no large chunks of fat & everything is incorporated.
Mix together the water, egg yolk & vanilla. Make a well in the center of the dry ingredients to pour the liquid into. Fold together with a rubber spatula until it comes together and forms a dough, about 12-15 turns. Form together to make a dough ball, divide into thirds and form each into a disk. Wrap in plastic wrap and refrigerate for at least 2 hours.


Use round peg style clothespins covered in aluminum foil & sprayed with non-stick spray. The foil wrap job doesn’t need to be neat; however, it is more important to leave a piece that you can use to remove the mold easily! *There are also stainless baking molds available in any number of sizes that I am sure are really quite nice, but they are also quite expensive, especially compared to the cost of the clothespins. (See photo above.) Plus, I must admitt, there is a bit of romantic-nostalgia to baking them using an old-fashion clothespin!
While the dough chills you can get your molds prepped. You will bake these on parchment lined sheet trays, so get a couple of those set up, too!
Making the Ladylock Shells
Roll this dough in a 50/50 mix of flour & sugar mixed together. Preheat your oven to 350 degrees & have your prepped molds & pans ready.
Sprinkle your work surface liberally and start rolling. When you are done you want a piece of dough, roughly the shape of a rectangle, that can be trimmed to a rectangle that is 12″ wide and 1/8″ thick. On my first roll I get a 12″x14″ rectangle and they get bigger from there because I roll the scraps into each new disk of dough. If that seems like it might be too much dough to work with throw the scraps back in the fridge as you go, remold them into a disk & roll this out, same as the others.
The dough should be uniformly thin, as close to 1/8″ as you can get and even. Use your rolling pin, as a guide, running the pizza wheel cutter up against the pin and cutting in even 1″ increments across the dough.
Time to wrap the dough around your molds – if you haven’t sprayed them down yet please do so now! The dough must overlap as you are rolling it on to the molds, same us you would a bandage. Wrap the dough once around the bottom of the pin then spiral upward. Lay the shell on a parchment lined tray. Space them evenly apart, you can generally fit about 15 per half sheet tray. As you fill a tray move them into the heated oven for 20 minutes. The shells are done when the pastry looks dry and and baked through. They may take on a little bit of color, but hardly any (ideally.)
When the shells are baked take them out of the oven and lest them sit for 1 minute.
Literally! 1 minute only!
Then start unmolding them, placing the shells on a cooling rack. To unmold hold the shell delicately in your hand and gently pull the clothespins out. Doing it while they are hot gives some flexibility to the dough. If you do not get them off the molds immediately you will have trouble getting them off in one piece; as the dough cools it gets crisp and crisp is not conducive to pulling out molds!
Let the shells cool completely before filling.
yummm…the FILLING!
Buttery Buttercream to Fill Clothespin Cookies
There are twentybillion different kinds of buttercream!! There are Italian ones and meringue ones and French ones and American ones and and and…
This is an American buttercream but it is far less sweet than a typical American decorators icing, more whipped for airy lightness and is perfect piped into these cookies. Use SALTED butter for this. If you use unsalted add a pinch while the butter whips.
The butter for this needs to be soft, not just room temp but softer. I suggest leaving it near the stove while you are baking. Use the whisk attachment on a mixer, to get as much air in there as possible!
12oz (3 sticks) Butter, soft
2 cups Powdered Sugar
2 Tbsp Vanilla
Whip the softened butter until it is light, glossy and almost white in color; this takes time, so be patient! When the butter is lightened up add the powdered sugar & vanilla. Mix on low until incorporated then whip on high until light, airy & fluffy. The buttercream should be a light creamy white in color and “stiffly” fluffy. Fill a pastry bag, I fit mine with a narrow tube tip but snipping off the top of a disposable bag or gallon baggie also works fine. Fill each shell with a squeeze on each end being careful not to blop all out the ends. When they are filled lightly sprinkle with powdered sugar.
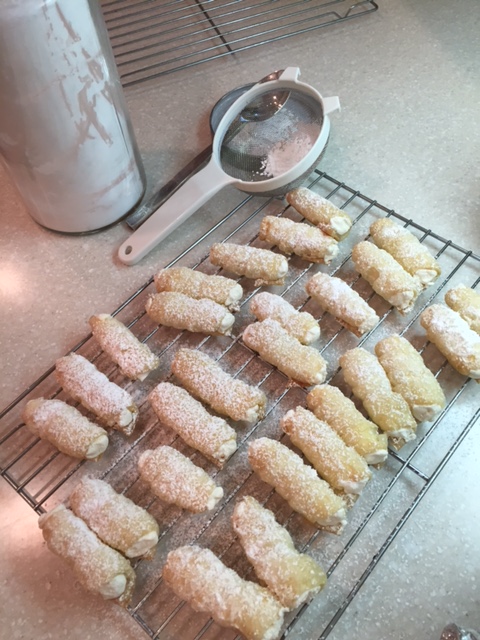
A flaky, lightly sweet, vanilla scented crust filled with a lighter than air buttery buttercream all dusted with powdered sugar! Yummmmmmm.


The perfect ladylock. Out of your kitchen. Whenever you want.
Or, if it suits you better, freeze them!
And just like Greg they’ll be available to nibble (just a few) without anyone ever knowing!

Aside(s):
The shells freeze well – but most baking sites recommend you don’t fill them before you freeze for best results.
Freeze in layers with parchment in between the layers in an airtight container.
*They truthfully do freeze pretty well filled, but the pastry is just a tidge moist after thawing, (as would be expected.) Same freezing instructions- layers, parchment, airtight.

nibble, nibble, nibble…
crumbs on the plate.
nibble, nibble, nibble…
it’s almost too late!
Hurry-Up!
Or you’ll miss the last bite
of something that is great!

hugs n’ blessings for all those enjoying the circus of life with treats along the way!

Thank you for sharing Helen’s adventures and your cookie recipe! I love seeing my pups all grown up! God bless.
LikeLiked by 1 person
Thank you Kathi!! Helen is magical! We LOVE her dearly…can you tell??? Giggles. Thanks for stopping by to see her and I do so very hope you have a chance to bake a batch of clothespins for yourself one day soon! Hugs & please stop back again to visit us…I promise a hug n’ blessing each time you do!!
LikeLike
These sound lovely! We grew up near a commercial bakery that did a larger version of this treat called ‘creme horns’–yours look so much better. Bookmarking this!
LikeLiked by 1 person
Thank you Pam!!! Such an honor to be bookmarked by you! (blushing…) I am familiar with the creme horns as well; although I’ve yet to attempt to make one! Probably best to leave those for the bakeries, giggles! Hugs to you for stopping by and sharing your kind thoughts!!! Hope to hear from you again soon!
LikeLiked by 1 person
Amazing! Never thought clothes pins would ever be part of a baking sensation! 🙂
LikeLiked by 1 person
These look so yummy!! Thanks for the awesome post and great recipe. 😊
LikeLiked by 1 person
Thank you kindly! They are DElicious and I do so very hope you are able to make them yourself one day! Thank you for stopping by & I do look forward to chatting again soon!! Hugs!!!
LikeLiked by 1 person
question? some other recipes have u roll dough out fold it in half roll again fold it in half then roll and cut into strips. I didn’t read that u folded ur dough. maybe I missed it but if not will they still be fluffy? making them for my son’s wedding. love your blog
joannah
LikeLiked by 1 person
Hello Joannah and welcome to my site! I am so verily glad you strolled through and am tickled by your kind compliment. I do NOT roll and fold, roll and fold. I roll and cut into strips & this method has always produced light and fluffy cookies for me. I do hope this method produces the same for you!! Perhaps consider seperating your batch in two and trying one half my way and the other half with the fold and roll method? This way you can quickly compare and decide which is best for YOU to use! Hugs & Blessings and I do hope you’ll stop by again for another visit!
LikeLike
thanks I may try doing it bothways.
LikeLiked by 1 person
Today I attempted to
Make lady locks. The only thing I mastered was the clothes pins covered in foils. That tail really is the key to getting them off the clothes pin! Tomorrow I try asgsin from scratch . No shortcuts on dough or filling! I will master this !! 🥹
LikeLiked by 1 person
Hi Marie! Keep up the good work! It took me quite a few batches to get the hang of it, but I promise it is very worthwhile to stick-with-it by the end. They are worth the effort in taste alone!! Hugs to you for strolling through my site AND for your determined attitude – it will surely pay off!!!
LikeLike